Sunday, July 23, 2023

Hacking the motion activated l.e.d. night light

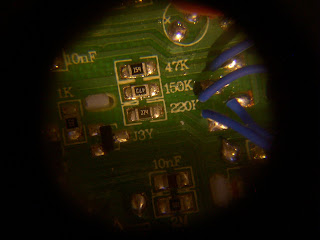
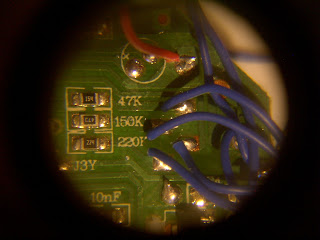
We will show you hot to extend the timing of the infra red motion led night light. The back of the device says 20 - 60 - and 90 second delay however when running a test the timing is 1/2 of each stated so we decided to extend the timing to about 85 seconds by using the chip resistors inside and placing them in series. You may extend it further by adding a resistor in series of 1 or all the timing resistors. First , remove the 3 screws from the back. [ photo 1 ] Then remove the 2 screws from the top [ photo 3 ] Find the chip resistors [ photo 3 ] and cut the traces labeled with a red line and add wire where the yellow line is. [ photo 5 ] This is for 1 setting only and all others will be disabled. If you wish you can experiment with different value resistors and place them in series with each chip resistor to add more time...for instance...add a 100k 200k and 300k , 1 to each of the chips for different delays of your choice...you can add a variable resistor to adjust the timing in place of a resistor - fine tune the time delay you wish and take out the variable resistor - measure the value - and place a fixed resistor of that value in place of the the variable one you used to fine tune the timing. Going further you can change the led's to infrared for hidden video cameras.....they will come on when someone enters the room but above 940nm infrared led's they won't see them but the camera will....
I tried a 100k in series with the 220k chip resistor and got a 60 second delay.
The next test was a 1meg in series with the 220k chip resistor and got about 3 min 45 sec.








Haking the 48led camp light....


This hack lets you use the
48led camp light with 1 aa
battery - instead of 3 -
and place it into
several operating and
dimming modes. ....
the circuit uses a DIY
from a led flashlight....
boast over 800ma at a
6volt output...from 1 AAA
battery but we are using 1 AA.


The AOR ARD9800 Where particular people congregate...

AOR ARD9800
Unlike d-star and alinco - you can digital talk, teletype [ 9600 baud ] and send photos all at once with ANY radio on ANY band and home phones too.

Energizer LED Headband Mod to all red LED's

For you hikers and campers you may wish to have an all red led headband light. Energizer has a good one at Walmart and it has 6 led's of which 4 are white and 2 are red. We will show you how to make a simple mod for replacing the 4 white led's with red ones. First we have to remove the 3 screws, small switch plate and swivel connector on the back.


Remove the switch cover and 3 screws & swivel


With the cover removed, you can see the 4 red circles , these are the led's that need to be removed and replaced.
Only 1,2,3, and 4 led's need to be removed

As you see the arrows point to where the screws are. Carefully use a low heat solider iron and remove these led's paining attention of the polarity, you may wish to make a small black mark on the circuit board indicating negative so you don't have to remover them in case of wrong insertion. Now that you have them out you have a choice of removing the remaining ones and replacing all 6 with brighter led's 5mm that are on the web. Current resistors are already placed in on the board for you. Battery life may be less but hey we hike and don't care we just want a better headband light for our self. Carefully removing the led's with out bending them will make it easier to form your new bends for the new led's you are replacing. make your bends with whatever suites you, I used needle nose pliers. Cut off the extra leads . What I did is notice that the 2 led's on top were in with only a bend at the top so I used this to measure before I removed the led and saving the old one will give me an idea with out having to measure the legs that are to be sticking out on the bottom. I then noticed that the led's are all of the same size from the bend to the top of the board where it is soldered so i used the 2 straight led's as a reference and cut all 4 to the same size before making any bends. Then I made all 4 90 degree bends on the led's. Removing the 2 leds with a bend on the outside you will be able to match the bend with the new ones. Properly place the correct polarity led's on the board and solider them in . After making small adjustments they should fit fine and you have a better red led headband light. Also, to get all 6 lights to stay on you must modify the switch or the most you can have on is 4.


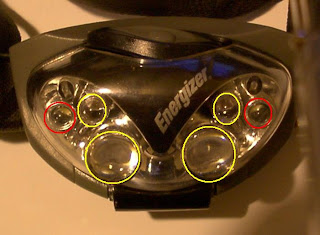
and on the front the yellow circles show the led's to be replaced and the red circles remain.